
This tutorial will teach you how to find xps (xnalara) simple 3d models and import them into 3dsexvilla2 as toys. We will start with toys, as usually they are simple to import comparing to complex toys like cars or planes and rooms.
In order to follow this “dummy” tutorial, you will need:
- A running installation of 3dsv
- A 2.79b blender installation (see how to install blender).
- The xps import tools for blender installed within blender (see how to install it).
Your work starts with finding the 3d model that you want to import to 3dsv. The simple idea is using google. In your web browser type “whatever you are looking for” + xps 3dmodel deviantart.
For this example, we will assume you want to import a magnum gun, so we search for “xps magnum gun deviantart” and we get some results.

Goto the pictures results page and click on “HandyFirearms XNALara Customized blah blah blah” (or click here if you dont see the specific result).
You must see a page like this

Click on the third photo.

Click on the download icon and check if the file is a zip file (this is good, we have a model here) or a png or jpg image. If you get an image, check the description for a download link. In many cases the creators do not upload directly on deviantart, but on megaupload and the similar. If you dont find a download link and the download icon is giving a picture, then go back and try another result on google photos.
In our case, we get a nice zip file
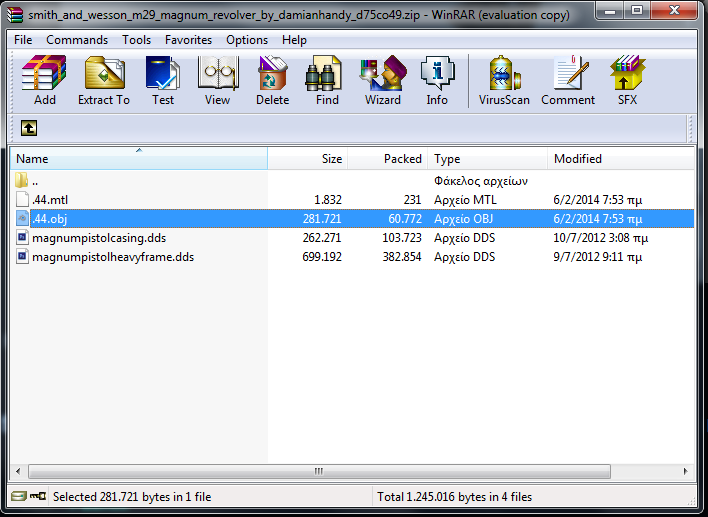
This zip file, in the subfolders, it has the geometry information in obj form.
In other cases, the file contains an .xps file instead of .obj , but the procedure is the same, we only change the import source:

Extract the contents of the zip file inside the 3dprojects directory on your computer. Create subdirectories if the zip file contains only files.
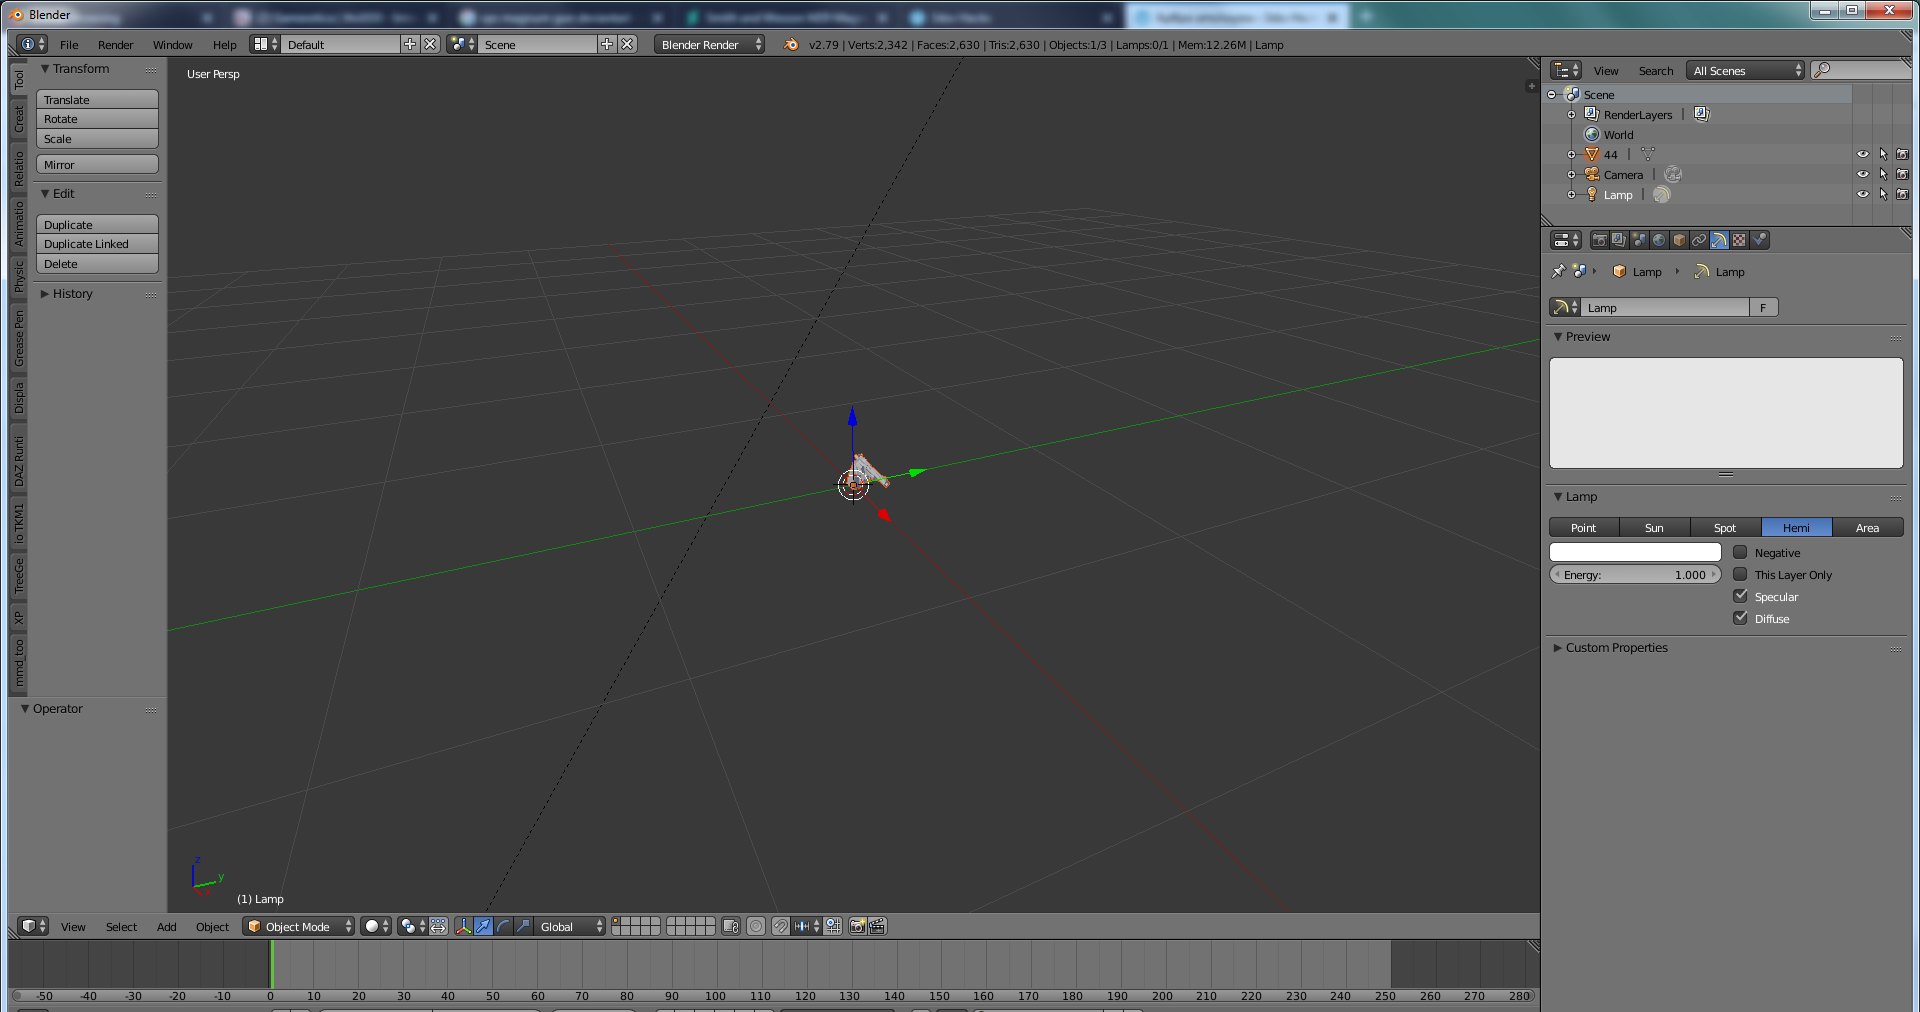
Now, launch blender, and import the obj file by clicking file–> import–> obj
(note that the xps addon is not necessary when your files are in obj format, as blender can import them out of the box, without the need for addon).

and select the obj file from the directory you saved it.
You should get something like this:
Scroll the mouse wheel to zoom on the gun. Control + Scroll to move the viewpoint left and right. Shift + Scroll to move the viewpoint up and down.
hold ALT button and right click and drag to rotate the view around the object.
Hit A to deselect everything.
Right click the gun
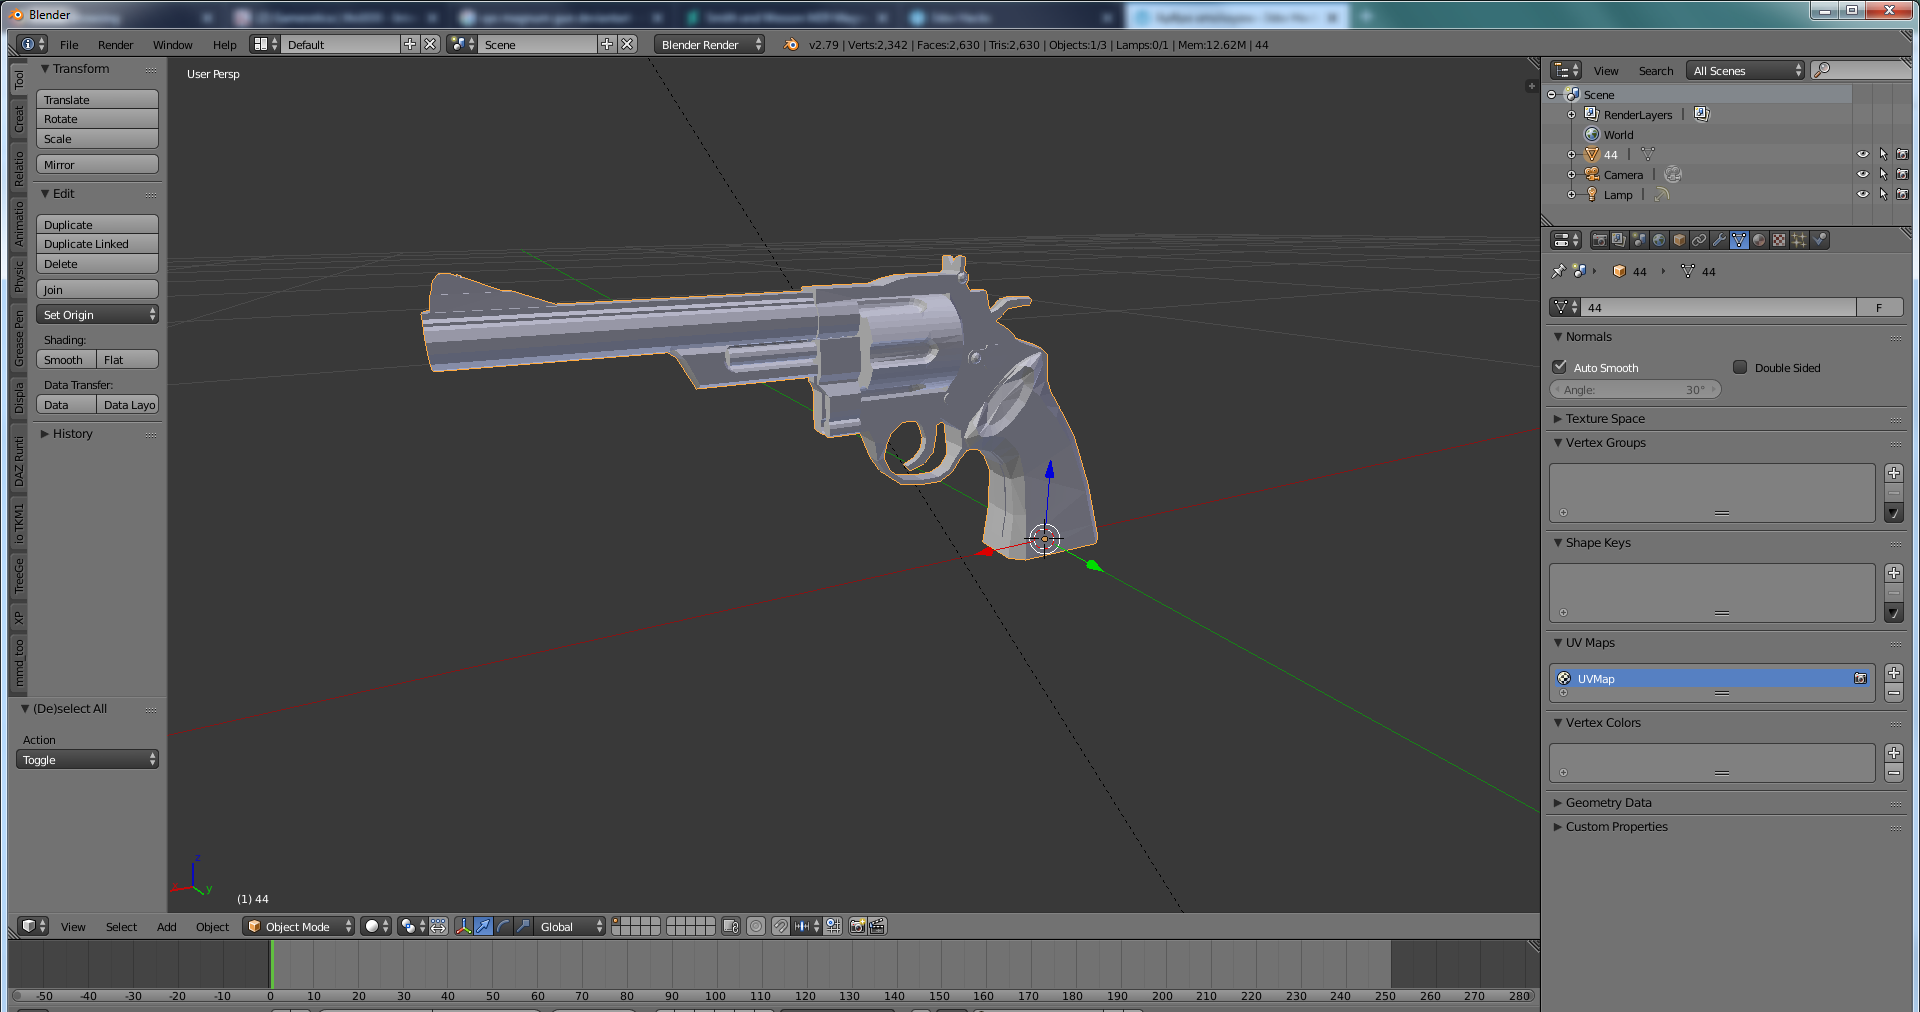
This gun has already a single geometry (by clicking it you select the entire geometry). I will post a tutorial for multi part geometry in another post.
Click on the materials icon (in the red circle) and notice that although this is a single geometry object, it has multiple materials.
But in order for your toy to look good inside 3DSV, you need a single geometry object with a single material.
To fix our issue, we have to go through the process of
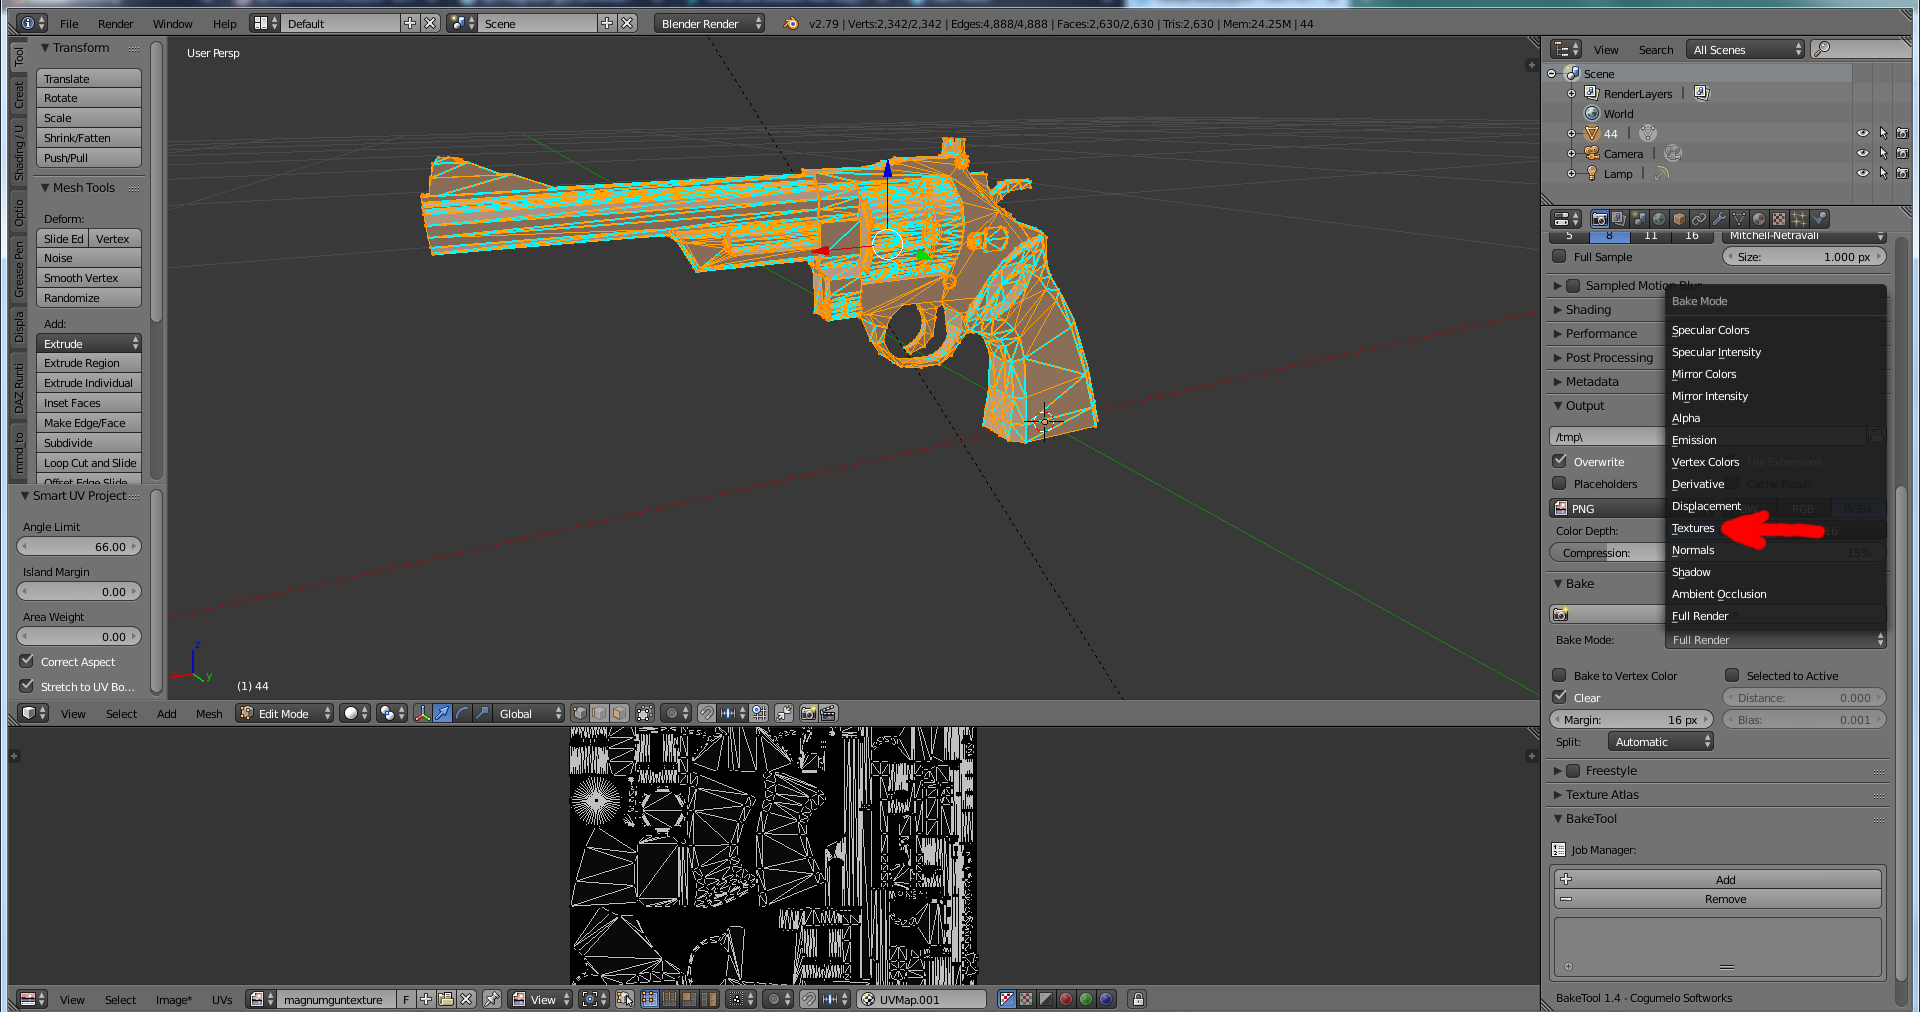
TEXTURE BAKING
I will not explain everything, but the generic approach to texture baking is to create a new UV map, and a new texture, and then transfer the effect of all materials of the object onto a single texture.
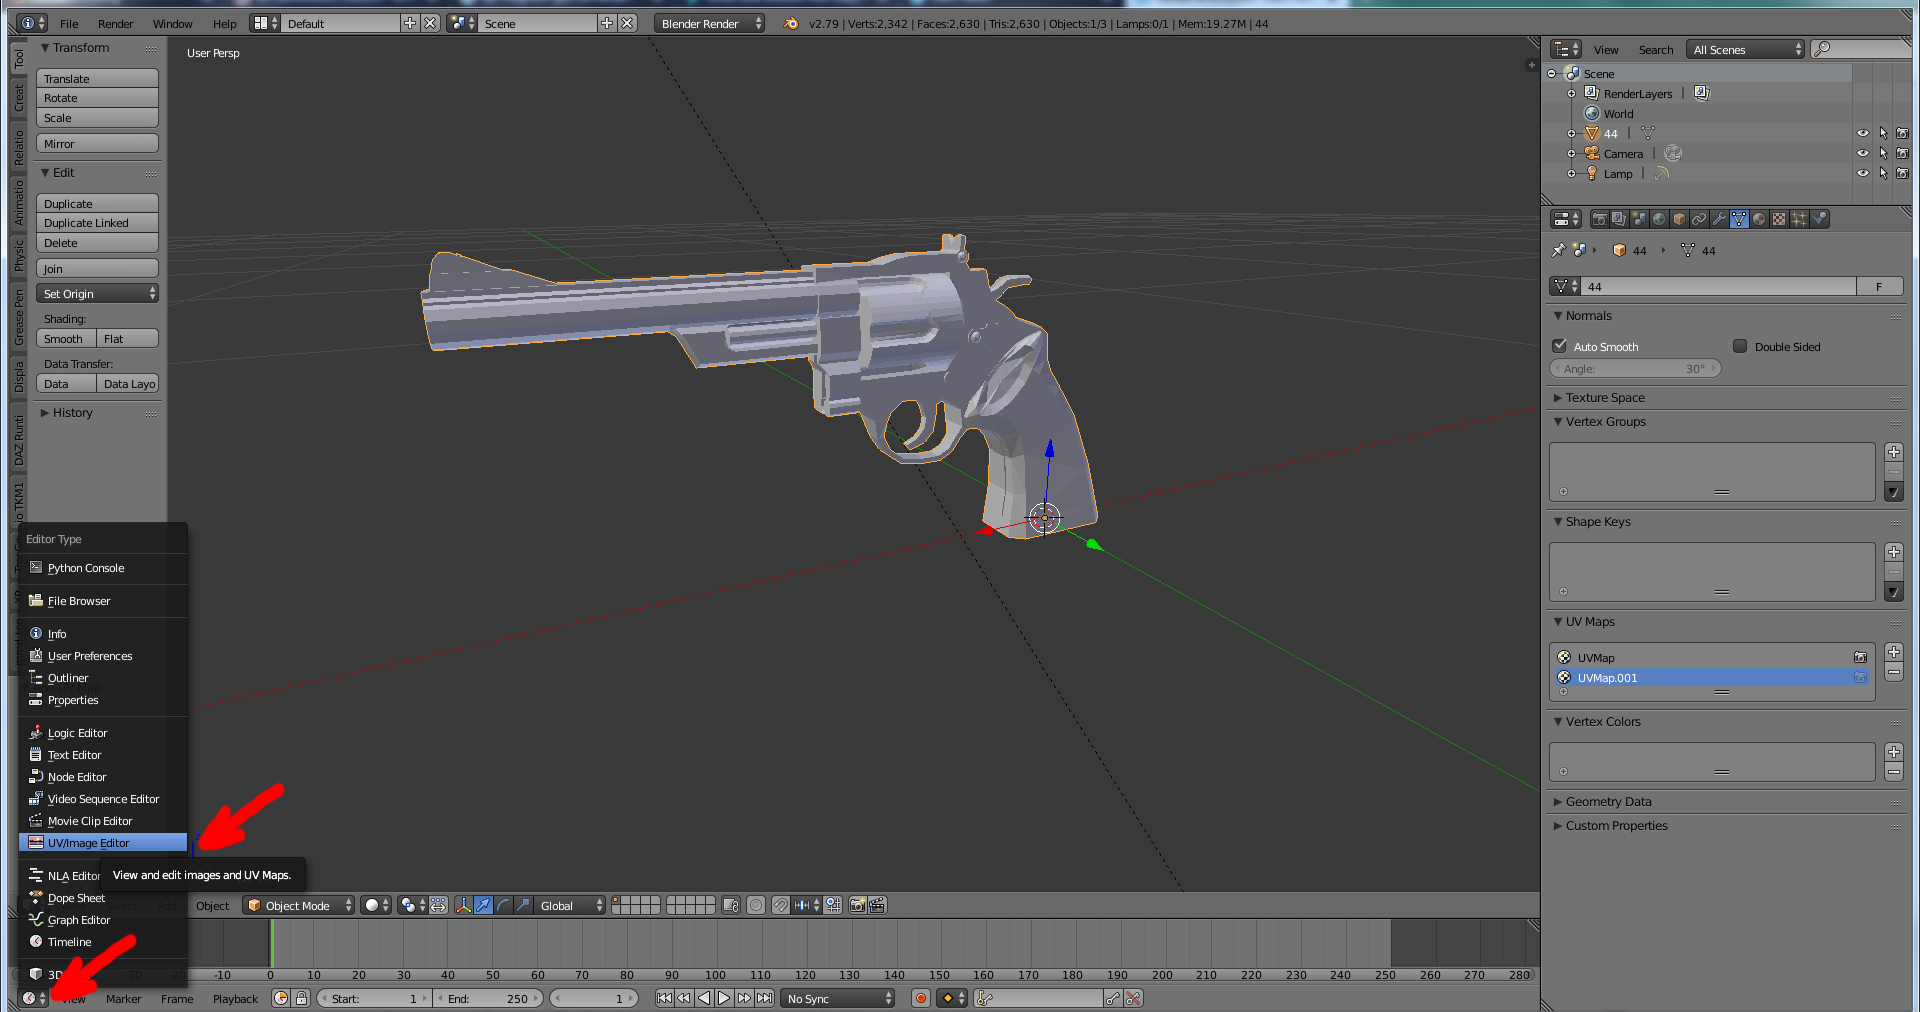
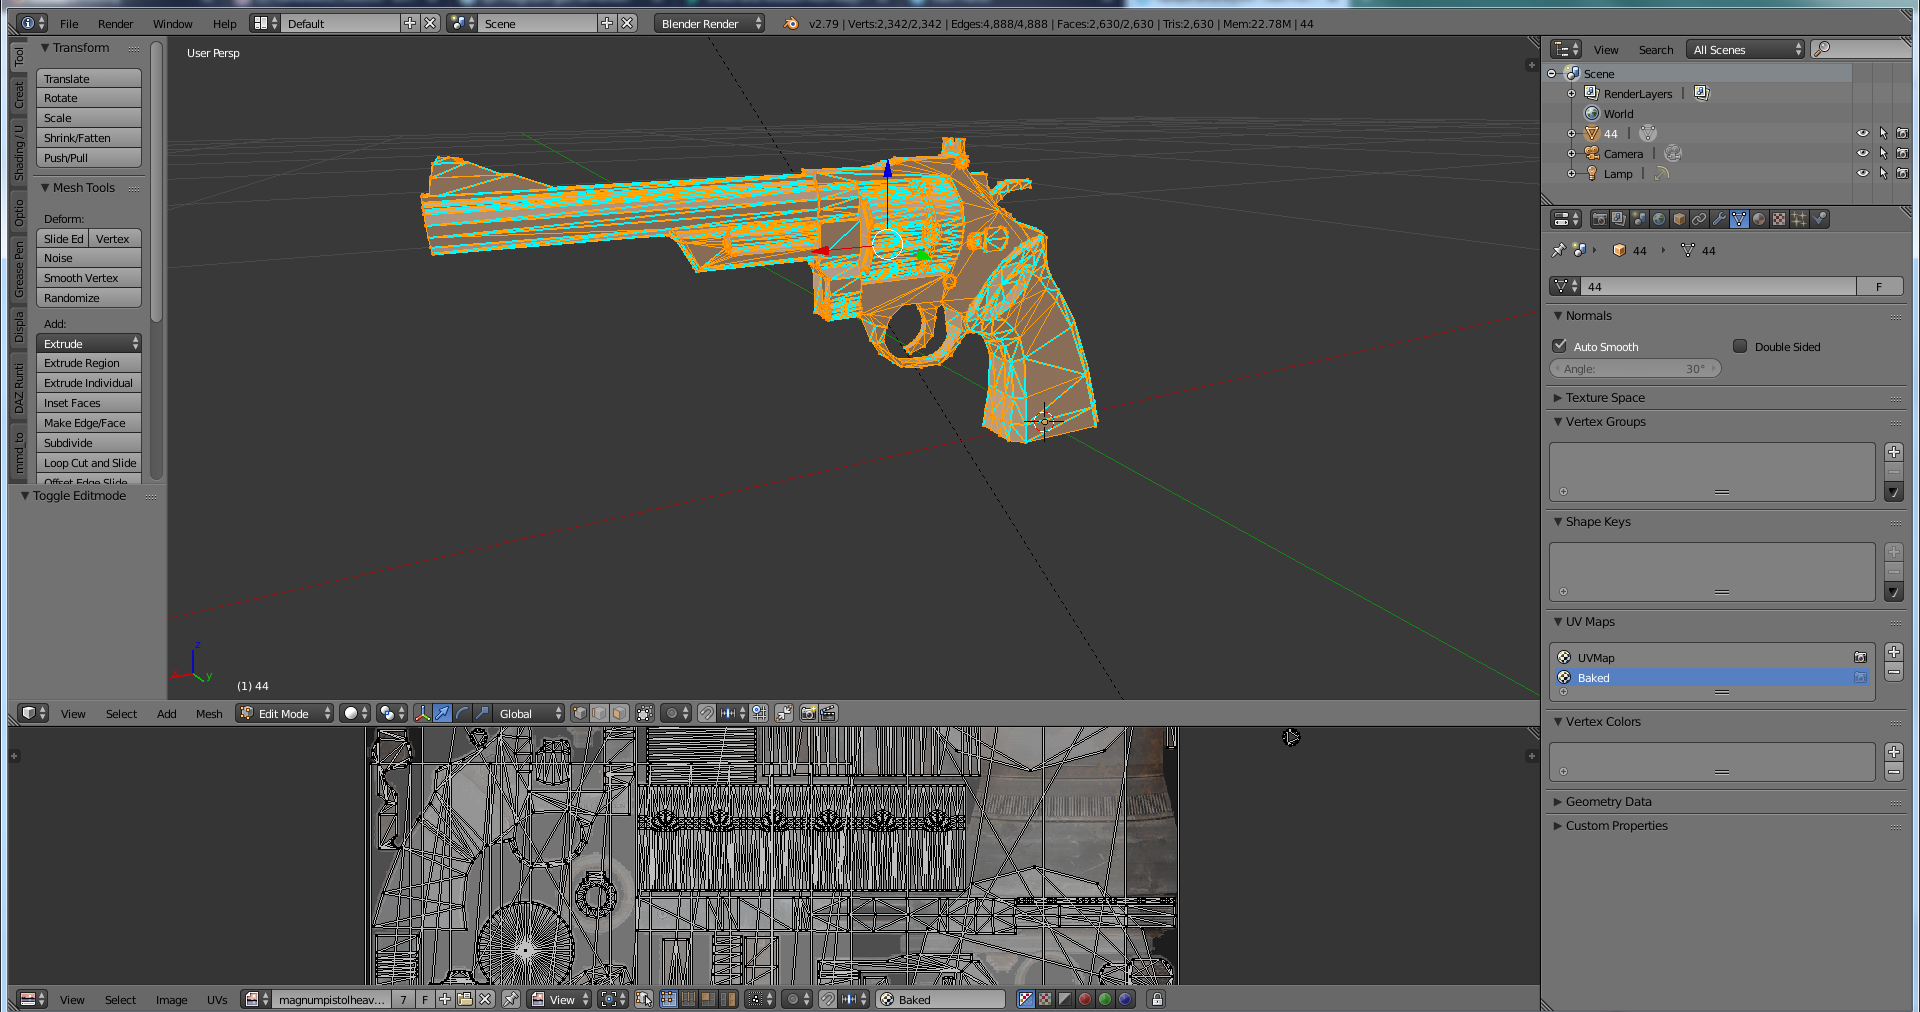
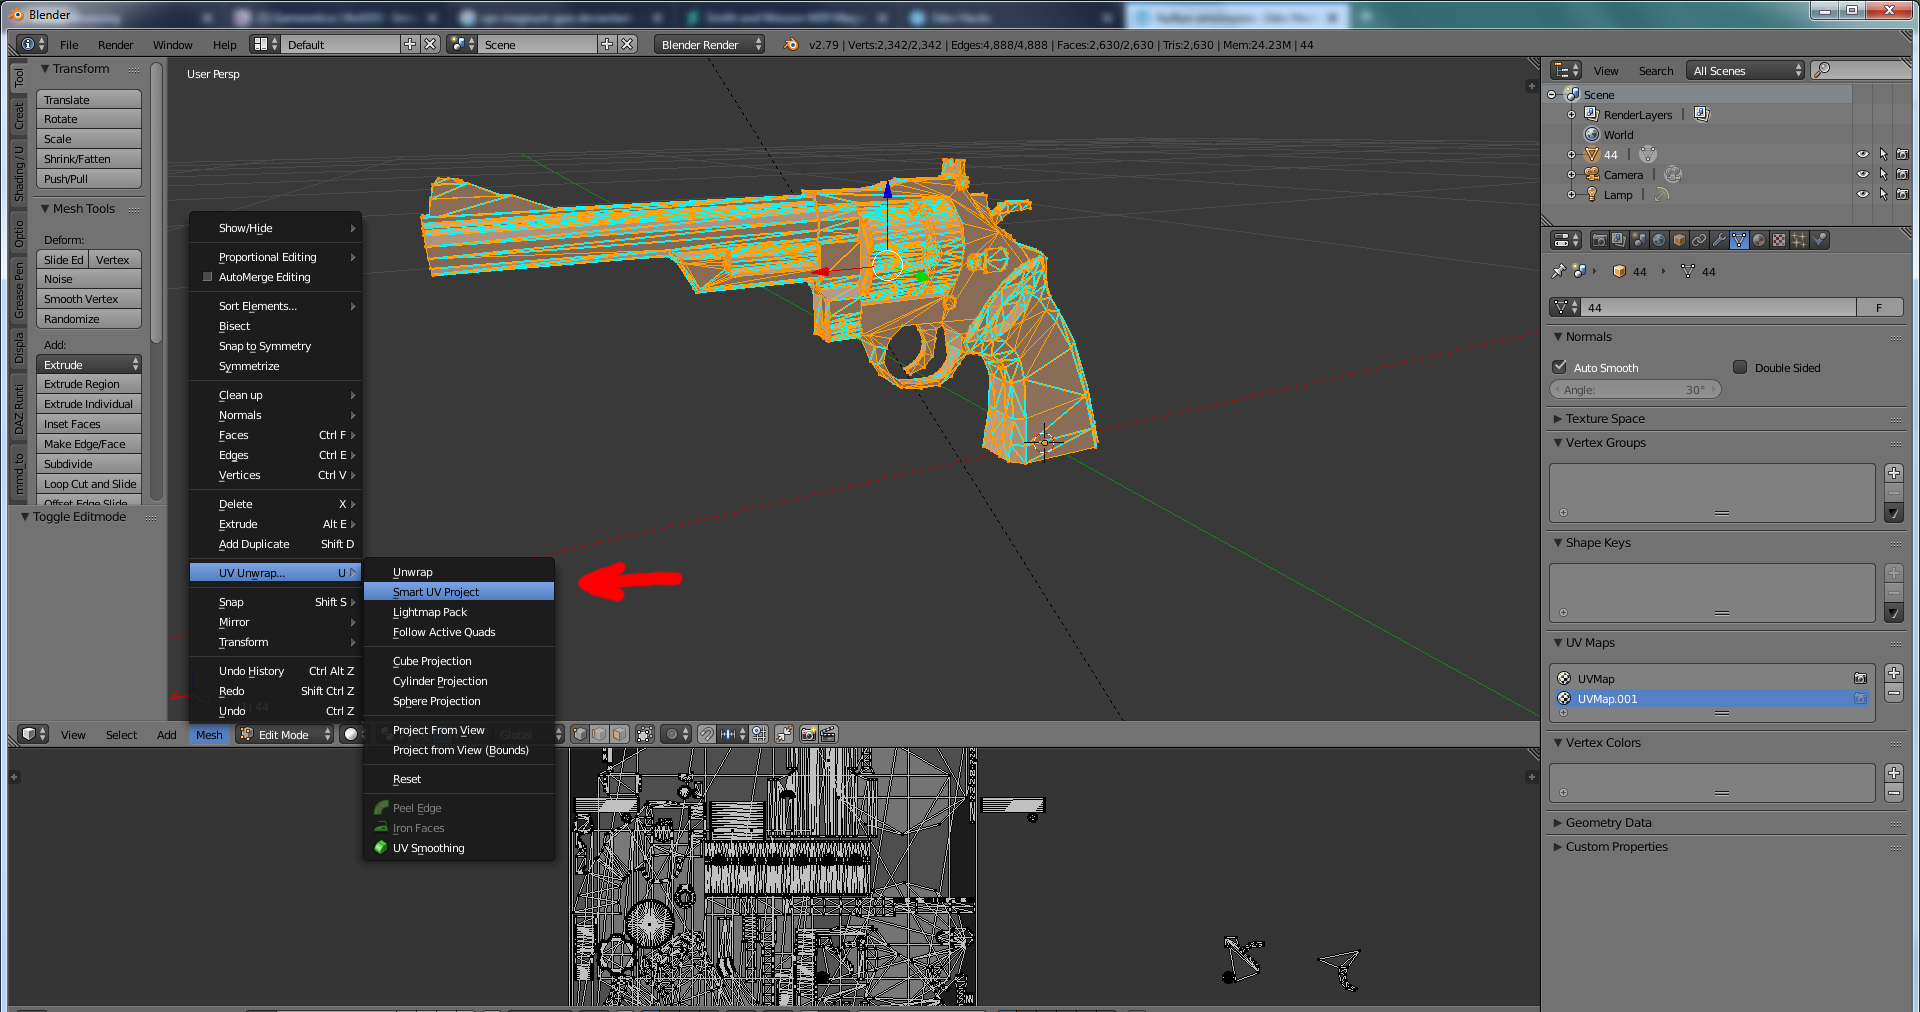
So first, lets create the new UV Map
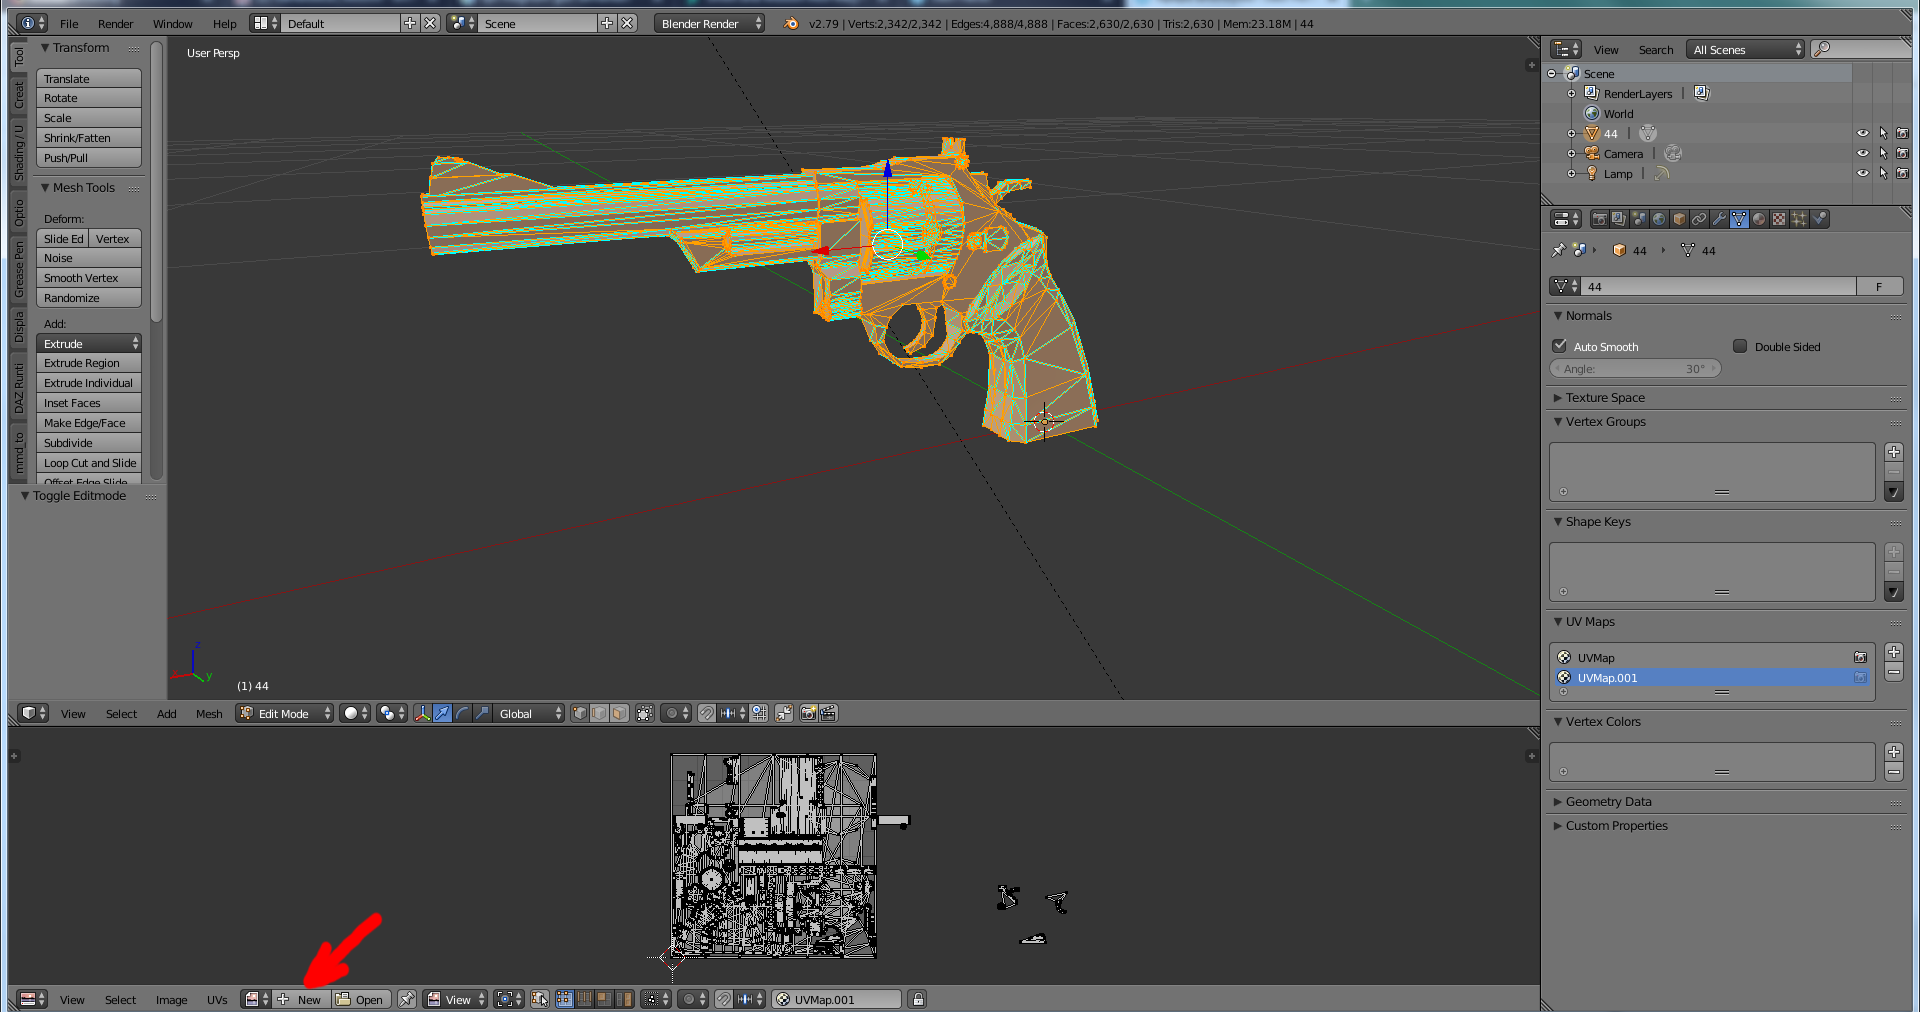
Click the data menu (the icon in the circled area) and then click + in the UVMap list to create a new uvmap for your gun. In our case, the uvmap “uvmap.001” was created.

Change the content of the lower blender window in order to see the UVMap of the object. Click The lower left icon and select UVMapping
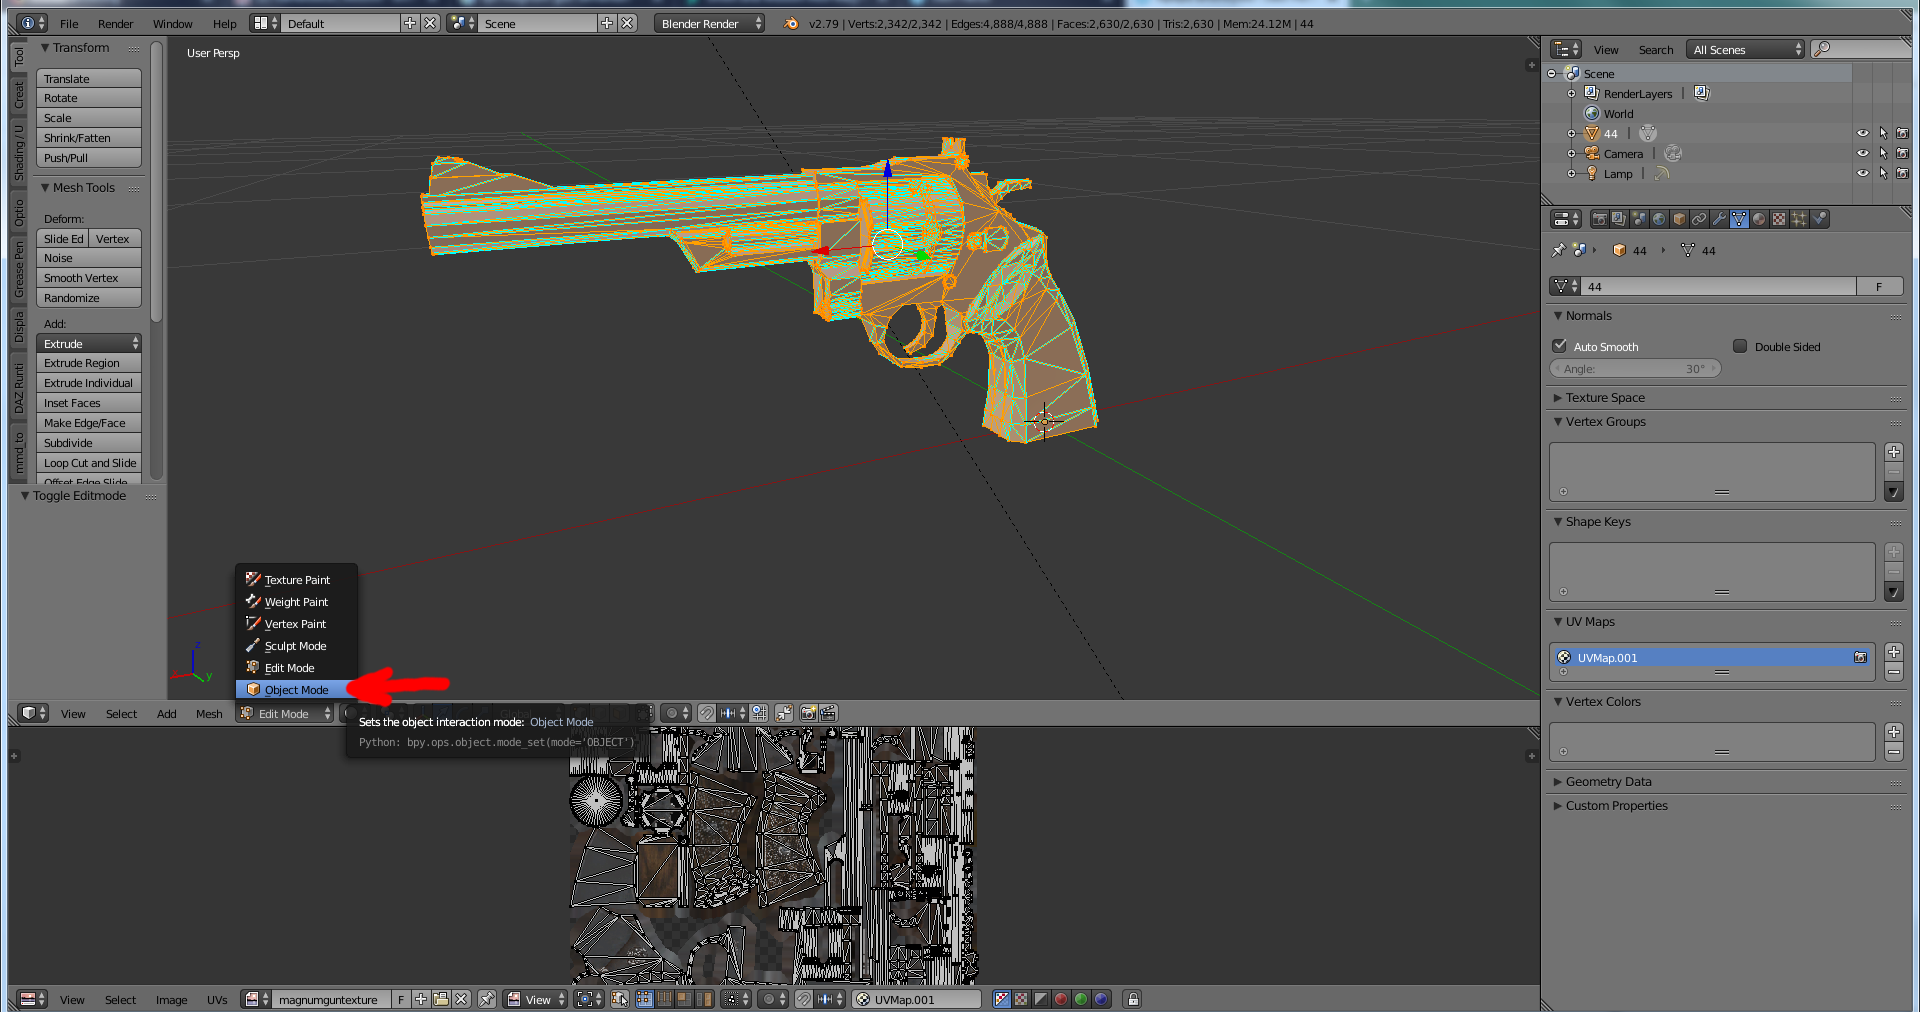
Now, with the gun selected, press the TAB Key.

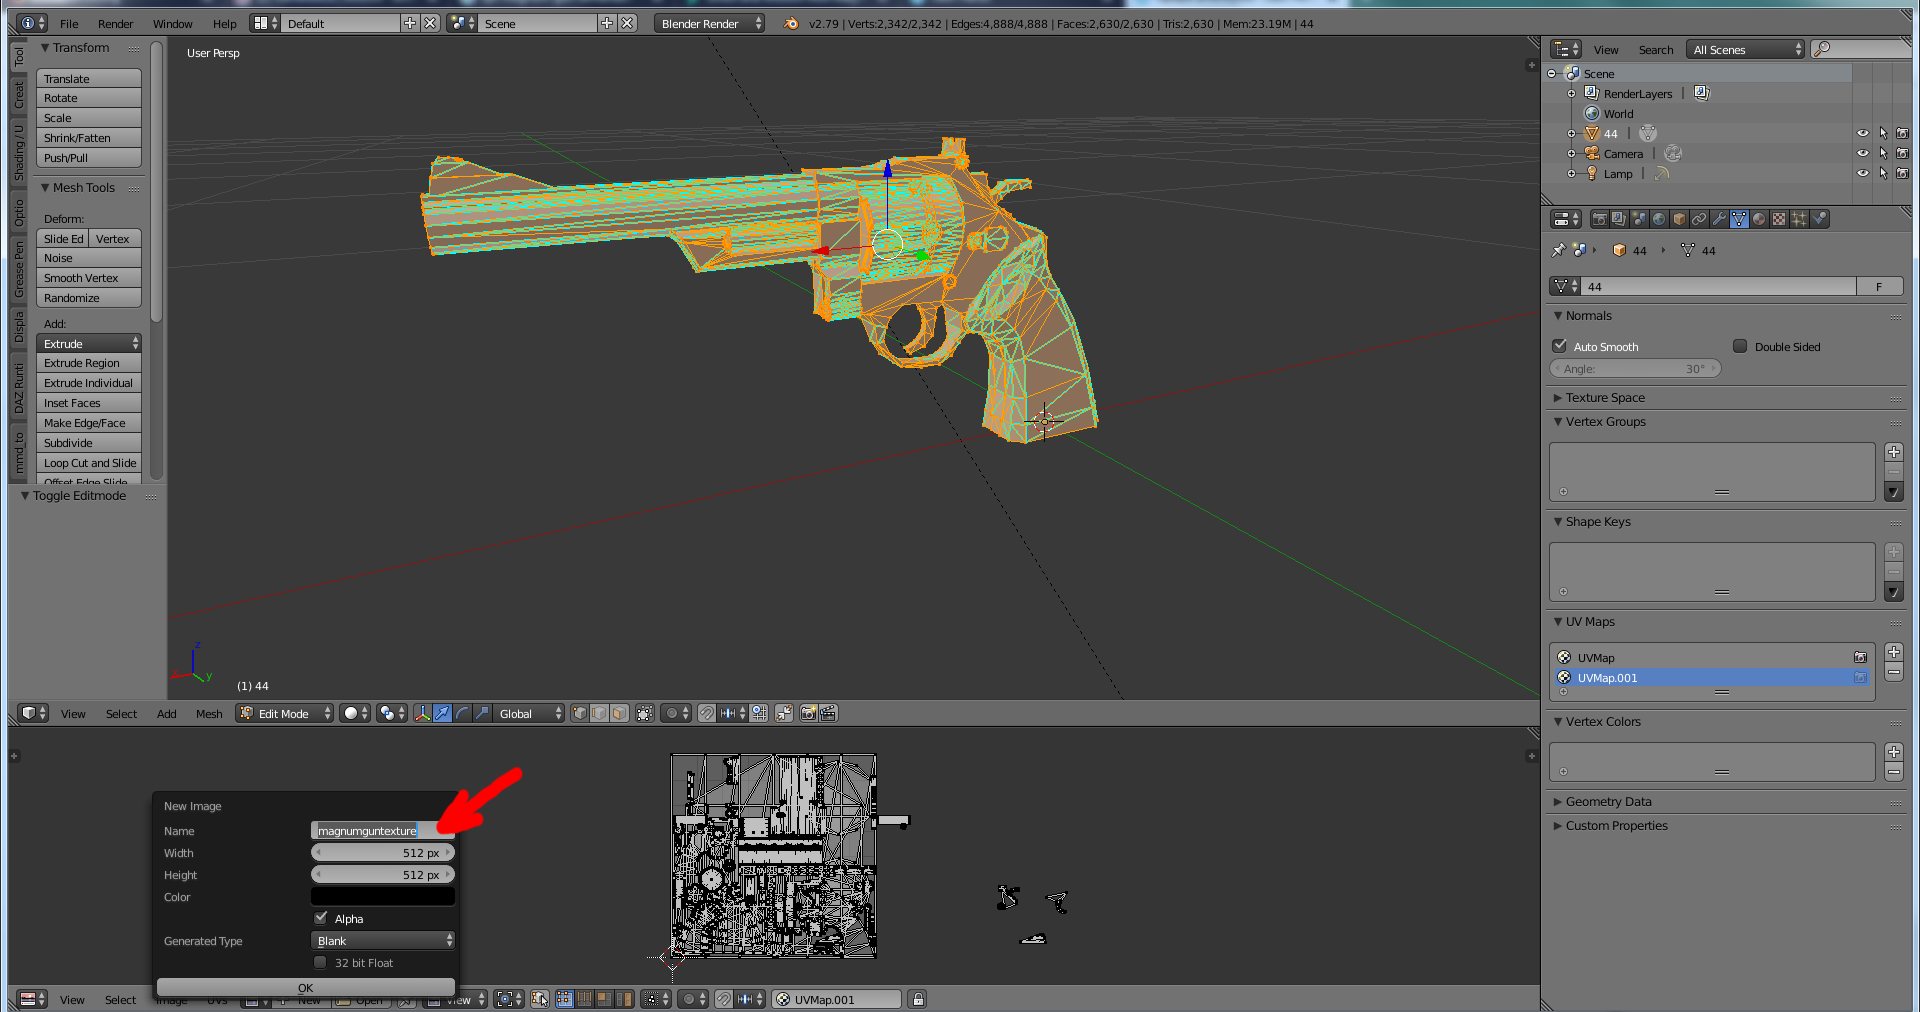
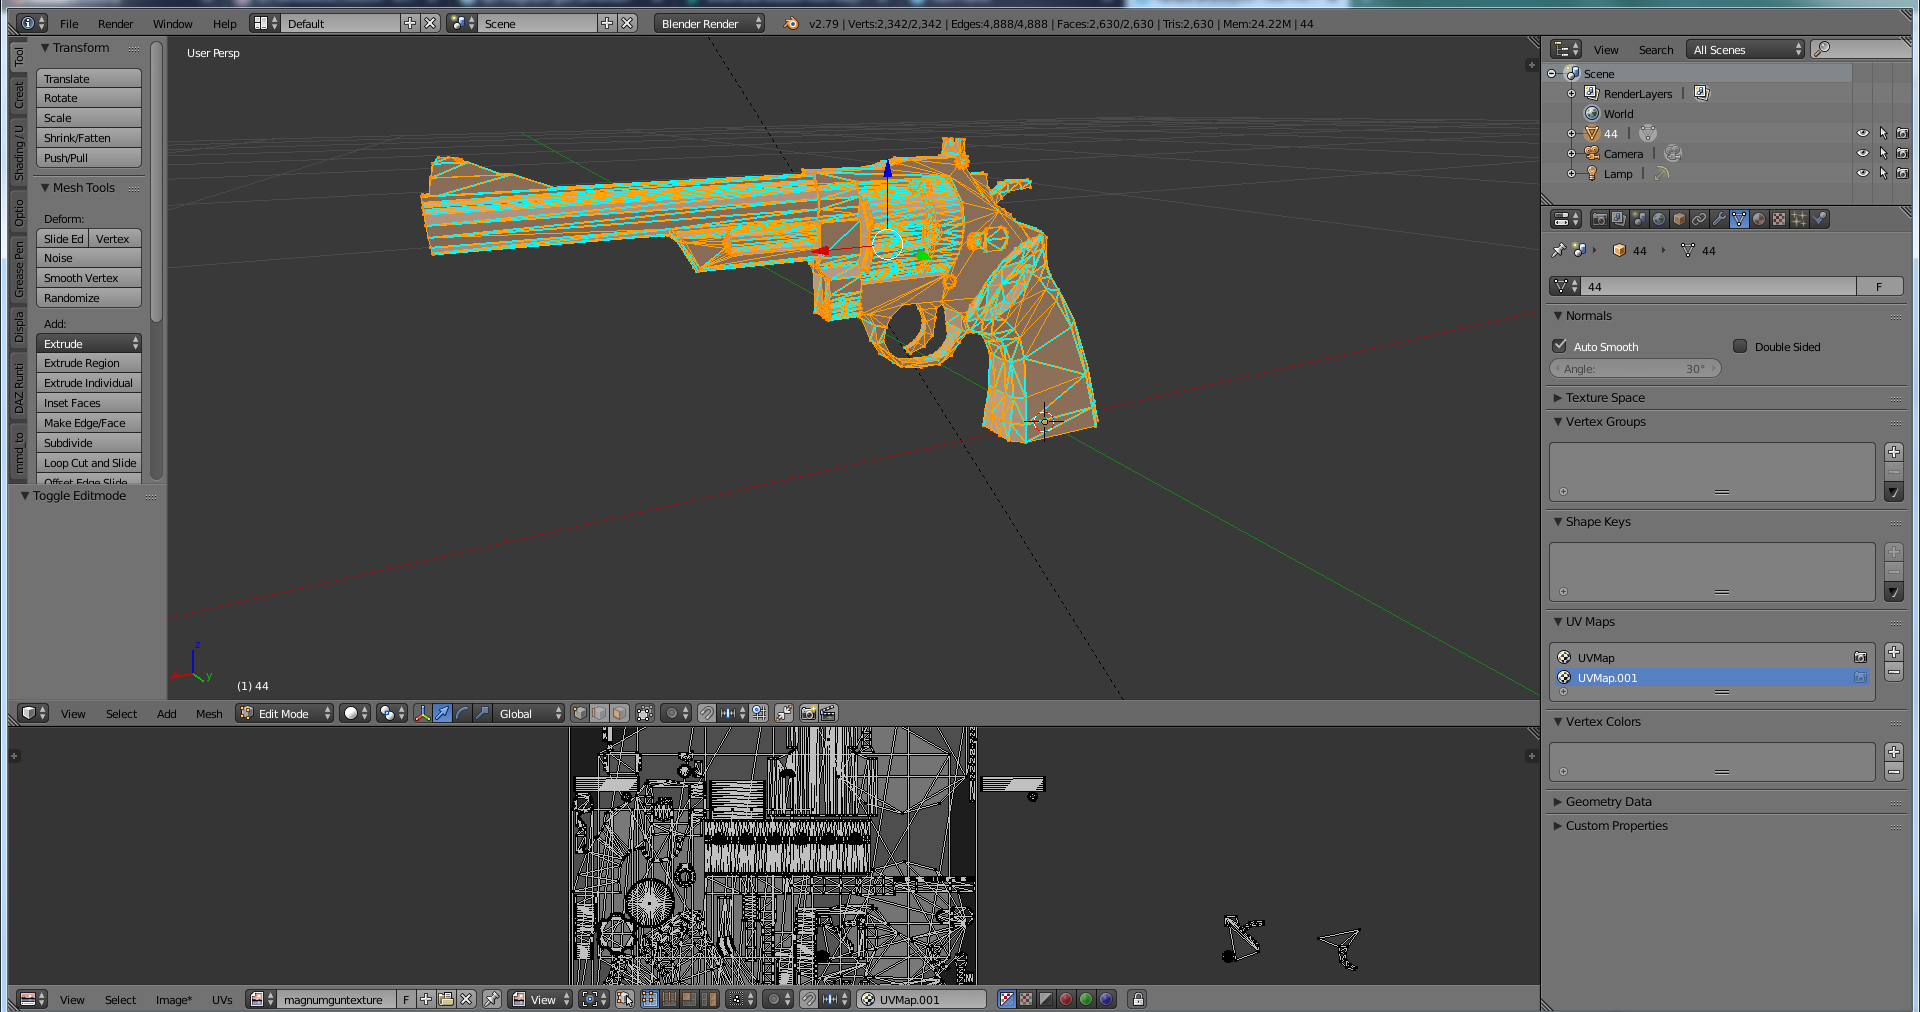


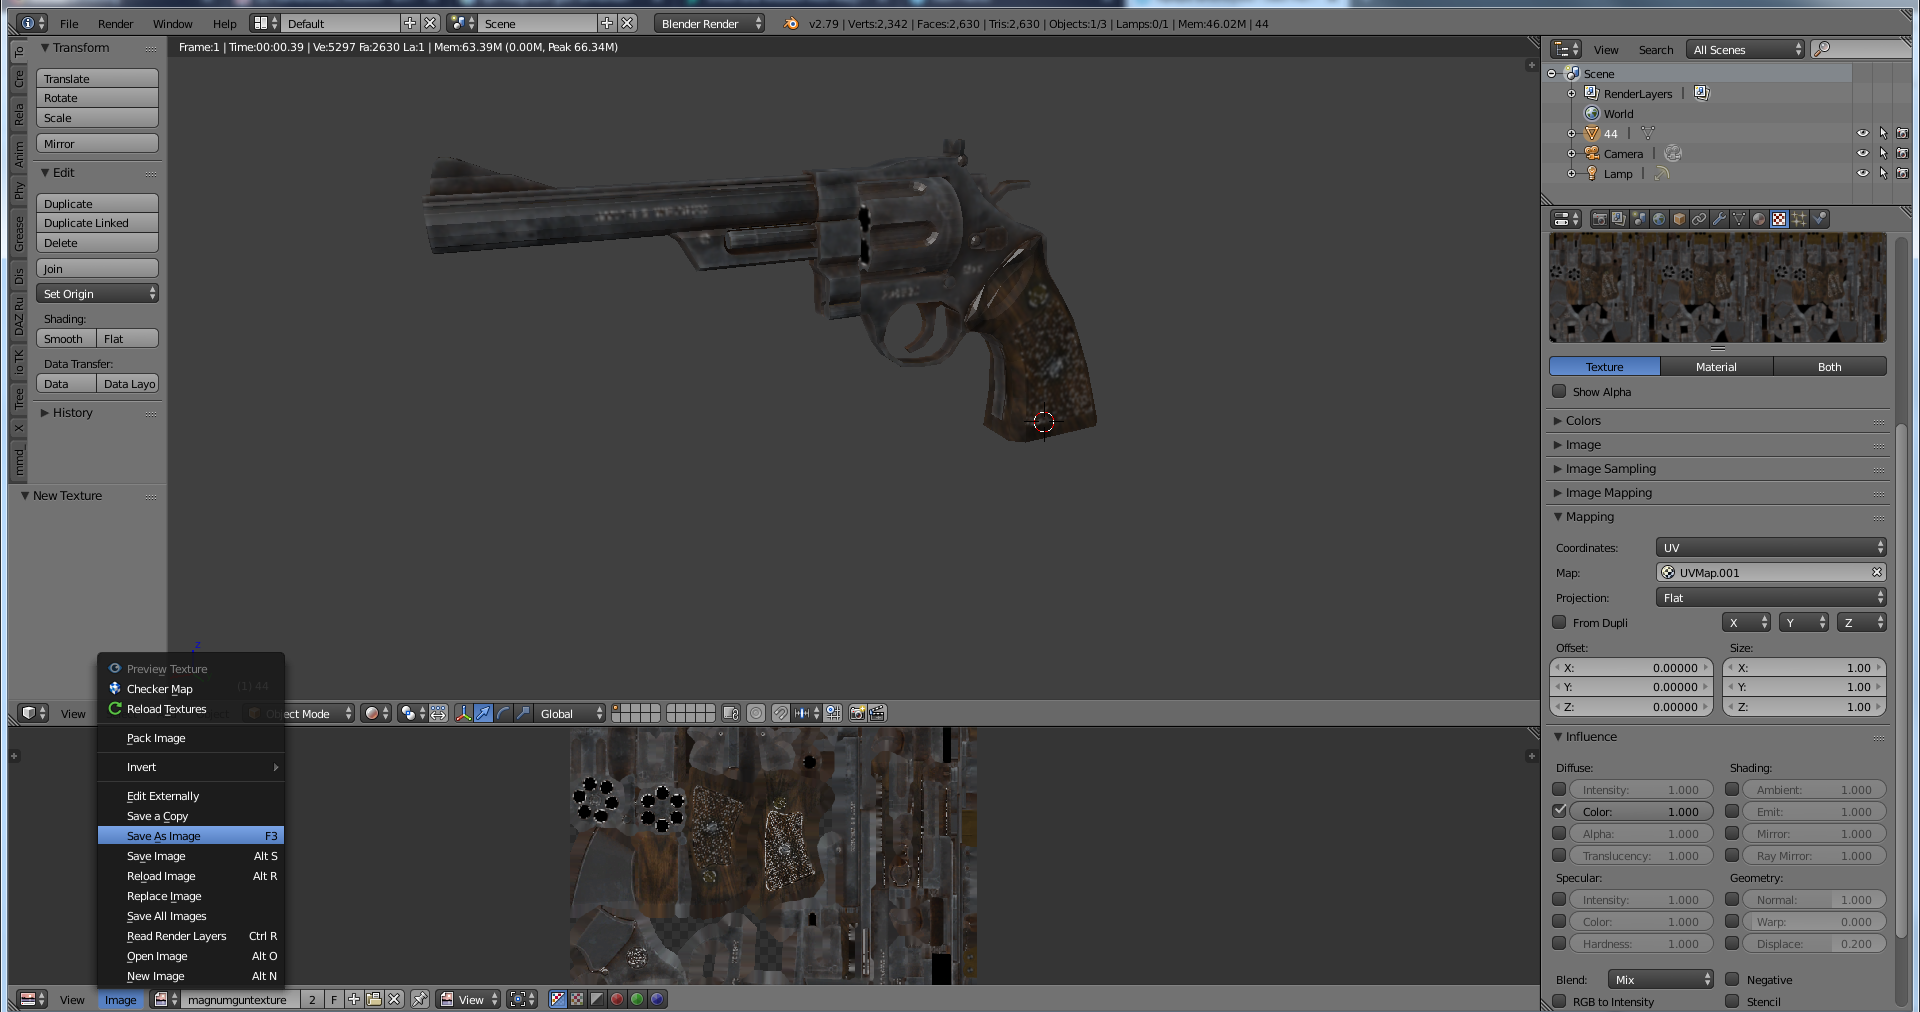
Name your texture and check which directory you are saving to.
At this point, SAVE YOUR WORK!
Then click on the DATA Tab (the one in the red circle below) and select the original UVMap.

Click the “-” icon or hit DELETE to delete it.
Then goto object mode:


Make sure you click “selected objects”, set scale to “0.01” and the parameter seto to “strip path”
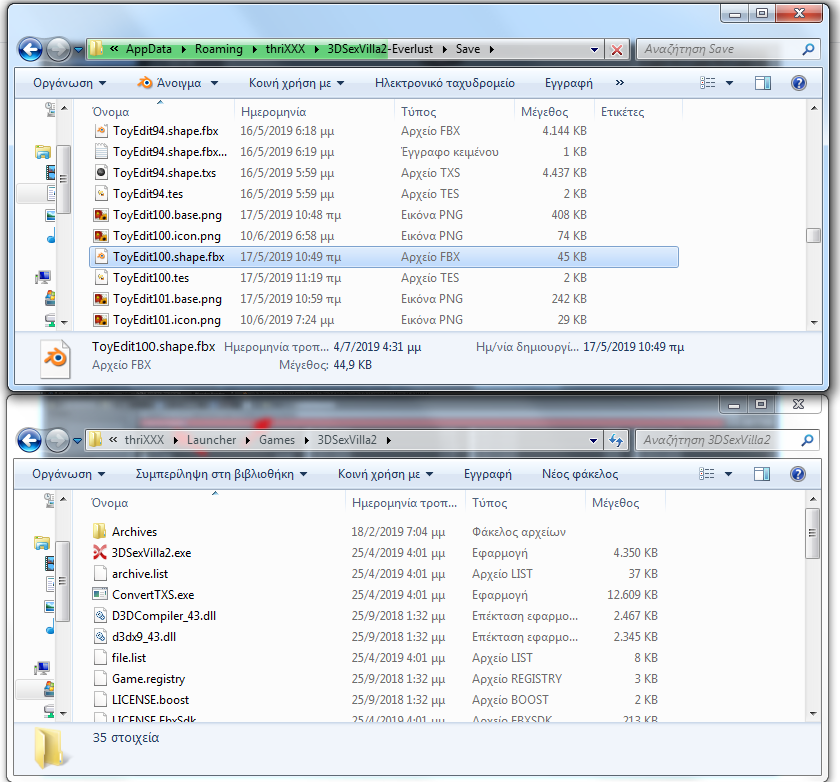


If everything went ok, you should have 2 new files in your save directory. The one is a log file, and the other one is the txx file, the geometry file that thrixxx can read.
MAKE SURE that the file with the name ToyEditXXX.tes exists. If it does not exist, copy the .tes file from another toy (or even better copy the original from thri.xxx website) and rename it to ToyEditXXX.tes exists where XXX is the number of the toy slot that you used for your toy.
Before opening your toy, it is a good practice to review your work, so make sure:
There is a texture with the name ToyEditXXX.base.png
There is a .txx file with the name ToyEditXXX.shape.txs
There is a .tes file with the name ToyEditXXX.tes
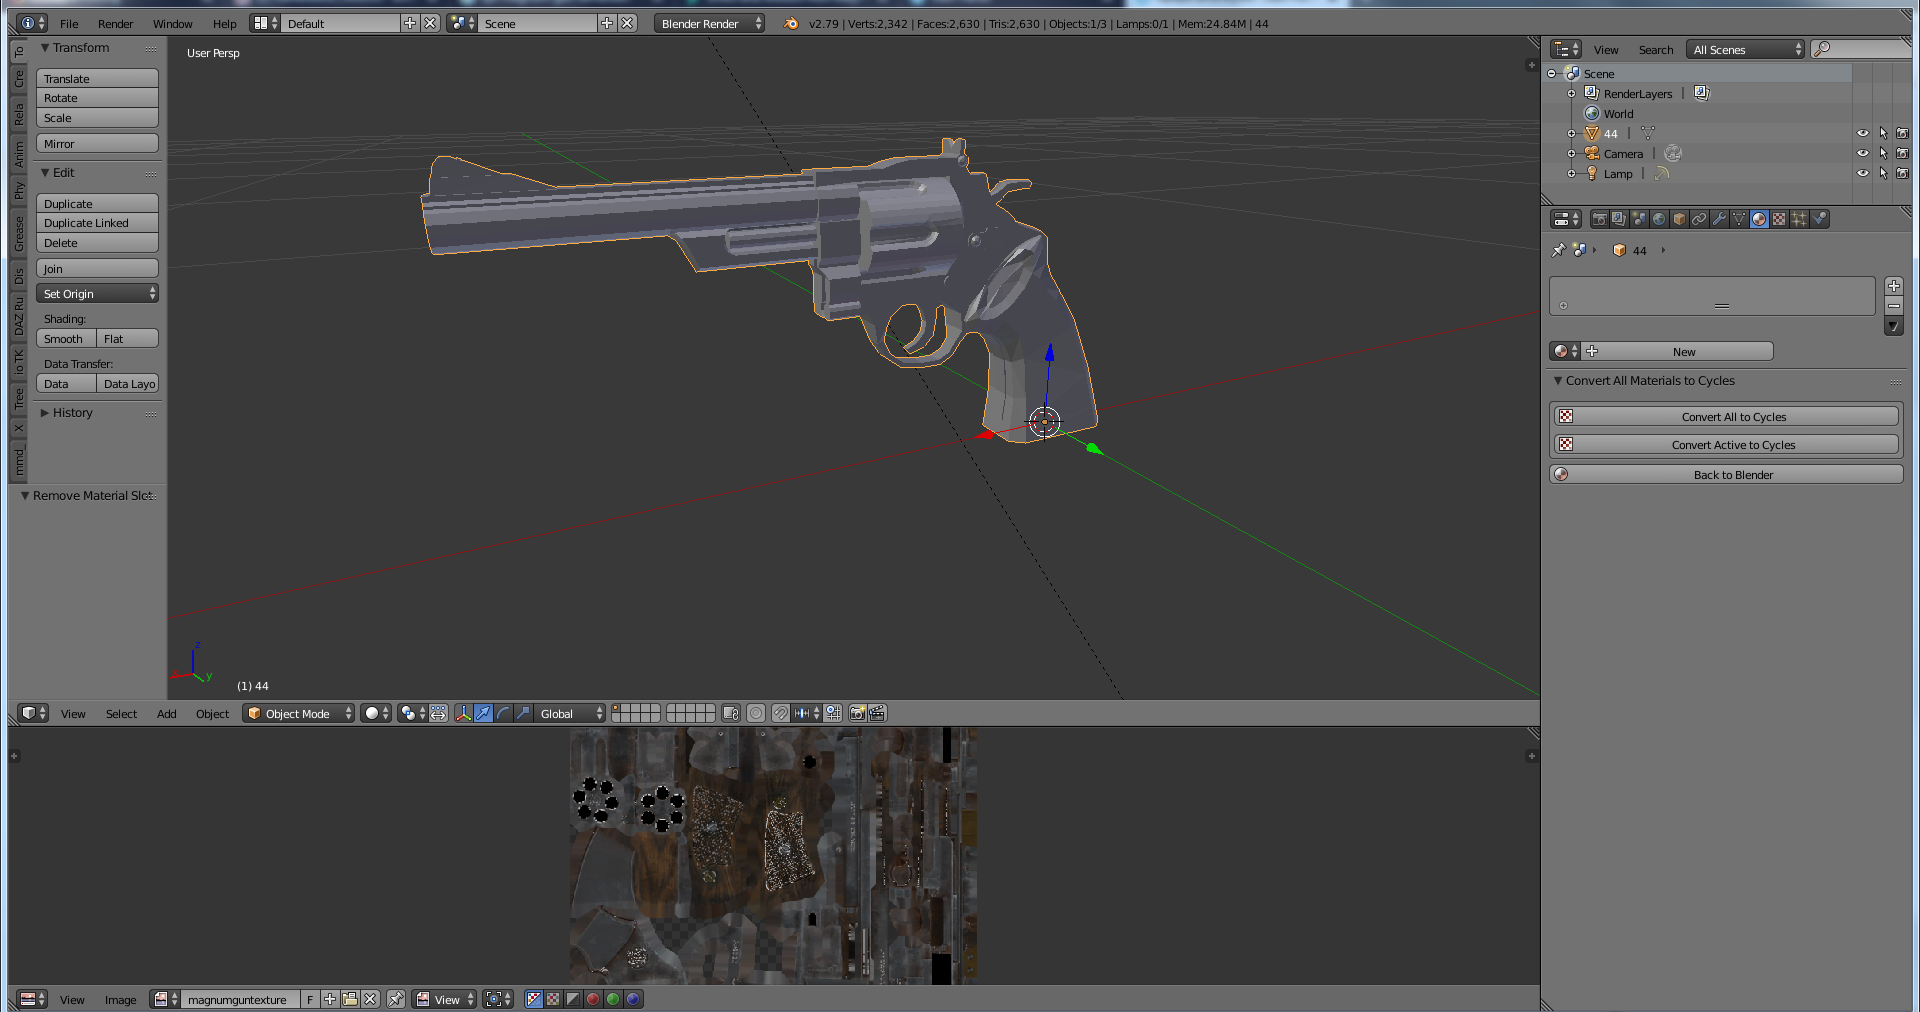
Now, you are good to go.
Launch your game, goto the toy editor, and open your gun. You will find it in the game’s toy slot number you have chosen. It’s name might be the same with the name of another toy (the toy from which you borrowed the .tes file). Open it, check it (especially the transparency and the reflections), and save it with your new name.

CONGRATULATIONS! YOU HAVE JUST IMPORTED YOUR FIRST TOY!
